Demonstration 2a: Feature Editing
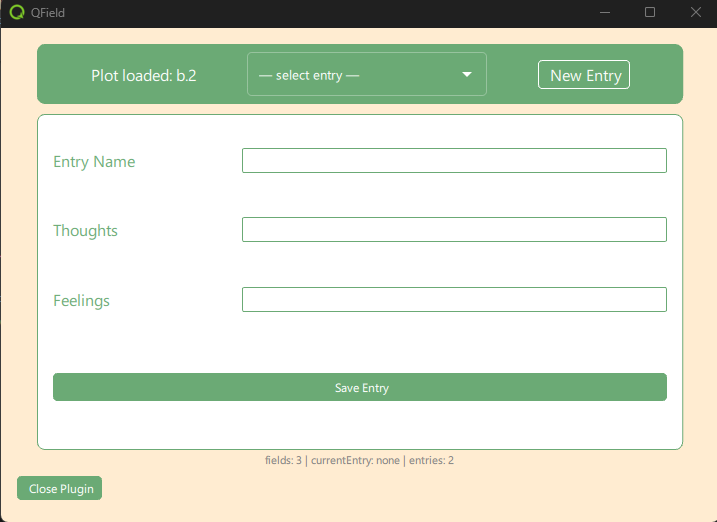
This demonstration extends the plugin component in qfield_vegetation_monitoring/demo2_selection. We have added a new geopackage layer to the project called entries. It has no geometry, and holds a completely generic list of attributes, along with a time stamp attribute, a primary key, and a foreign key to the plots layer which is the plotId sent by the pointHandler in the main module. The plugin component now contains a very simple entry selection menu, a new entry button, a simple form, and a save button. We will use this simple form to demonstrate basic feature edit operations.
This form, and the entries layer, are not part of the final plugin. This is a detour for demonstration purposes. It will help you to understand the more complicated code in the rest of the demonstrations. This is also the last demonstration that will be covered in the workshop. The remaining demo projects are left for your later perusal.
What We Will Learn
- How to implement a Model-View-Controller Architecture in QML (and why you should bother.)
- How to use a Repeater to dynamically create UI elements from a Model
- How to add a row to a table via the QField interface
- How to update a row via the QField interface
- How to delete a row via the QField interface
What Does It Do?
- When the user clicks on the canvas, the plugin component is loaded with the plotId.
- When a plotId is received, the plugin component's Controller checks if an entry exists in the entries layer with a foreign key matching the plotId. It loads these to the selection menu.
- When the user selects an entry, the form is populated with the entry's values.
- When the user clicks New Entry, the controller adds a new, empty entry row to the entries layer.
- A UUID is set for the primary key f_uid
- The current date is set for the log_date attribute
- The plot ID is set for the plot_id attribute as foreign key for the plot layer.
- A default name is set so that the entry will be identifiable in the selection menu.
- After the entry is added, a refresh of the selection menu and form is triggered.
- When the user updates a value, the update is saved to the controller's feature container.
- When the user clicks the save button, the controller saves the changes to the entries layer.
Setup
- Create a new project directory: ${ROOT}/qfield_project_demo_2a
- Copy the entire demo directory ${ROOT}/qfield_vegetation_monitoring/demo2a_crud to ${ROOT}/qfield_project_demo_2a
- Open the project in QGIS if you want to see the structure of the entries layer. This is included in the project as a non-geometry layer.
- Run QField from the command line to open the project directly as a local project.
"C:\Program Files\QField\usr\bin\qfield.exe" ${ROOT}\qfield_vegetation_monitoring\demo2a_crud\demo2a_crud.qgs